Building a Basement Playroom
January 2026
Intro
To help pass the time and channel my three-year-old's energy this winter, I've been working on turning my garage into a playroom. I'm really happy with how it's turned out! I put a ton of effort into researching and planning, so hopefully this post can help others who want to do something similar. I'll document my design and construction process, materials, and resources I consulted.
Agile Development

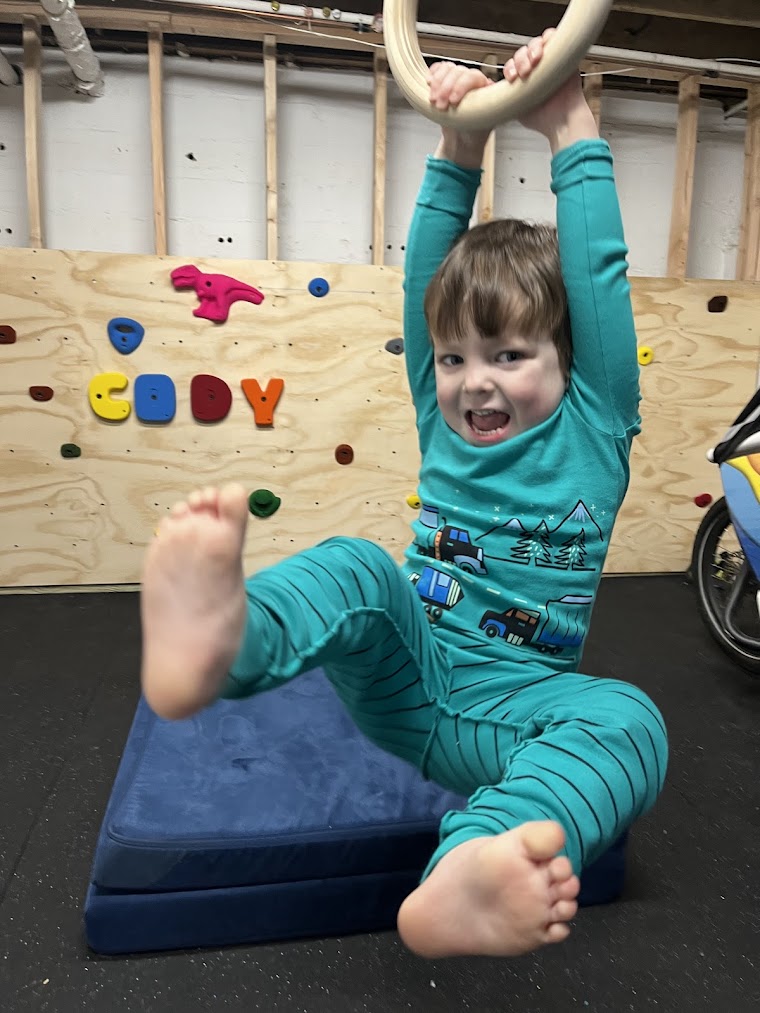
I had a lot of big ideas going into this project, but I was very limited by the size of this one-car garage, and by the fact that we were living and playing in the space throughout the project. This is also my exercise space and our playroom, so I wanted to make sure that it was a usable space every step of the way, and that I could adapt to my son's interests. As an early experiment, I started letting my son play by hanging from the pull up bar that I already had. He loved playing on it and was asking for more, so I knew he would love what I had planned next.
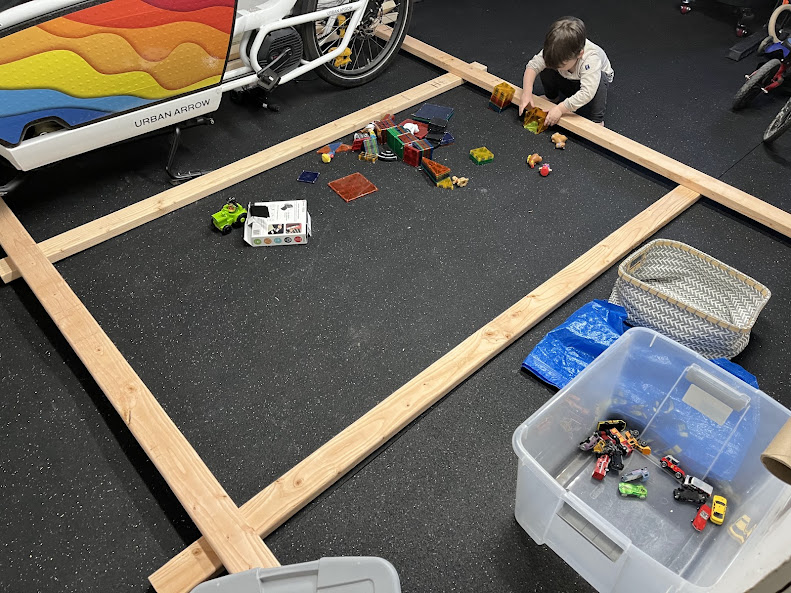
I introduced the rest of the plans slowly as we worked on them, and the excitement was high throughout. When we ordered all of the lumber for the climbing wall, we spent a while playing with it on the floor - 2x4's make great balance beams, highways, and fences for animal farms =)
The Climbing Wall
The biggest part of the project is a climbing wall. This has been a goal of mine for years, so it was so fun to build.
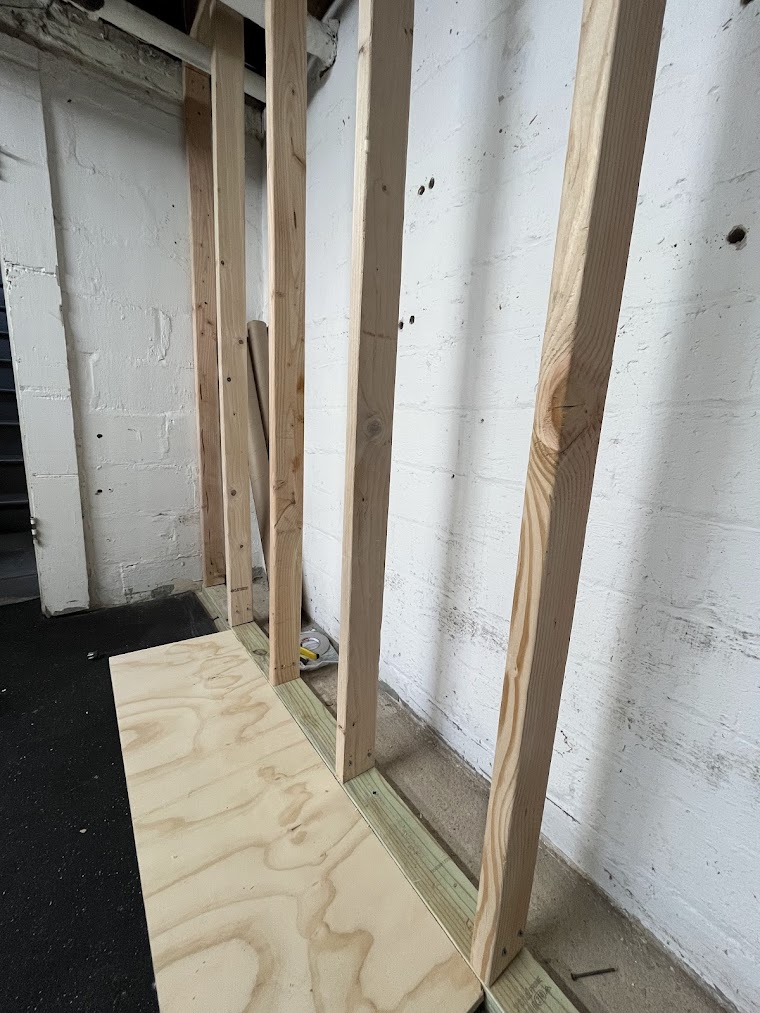
My garage has cinder block walls, which are strong vertically but not designed to handle shear loads, so I started by building a stud wall that I could trust to safely transfer weight into the floor. I constructed the stud wall using 2x4's, with pressure-treated lumber for the floor. I used tapcons to secure the floor plate and both side walls, and some big nails (see full part list below) to attach to a joist in the ceiling. There are a bunch of radiator pipes around there, so I had to build the stud wall in place. I spent a ton of time making sure the studs were plumb, straight, and evenly-spaced. Toe-nailing was tight, so I ended up using wood screws for a lot of it.
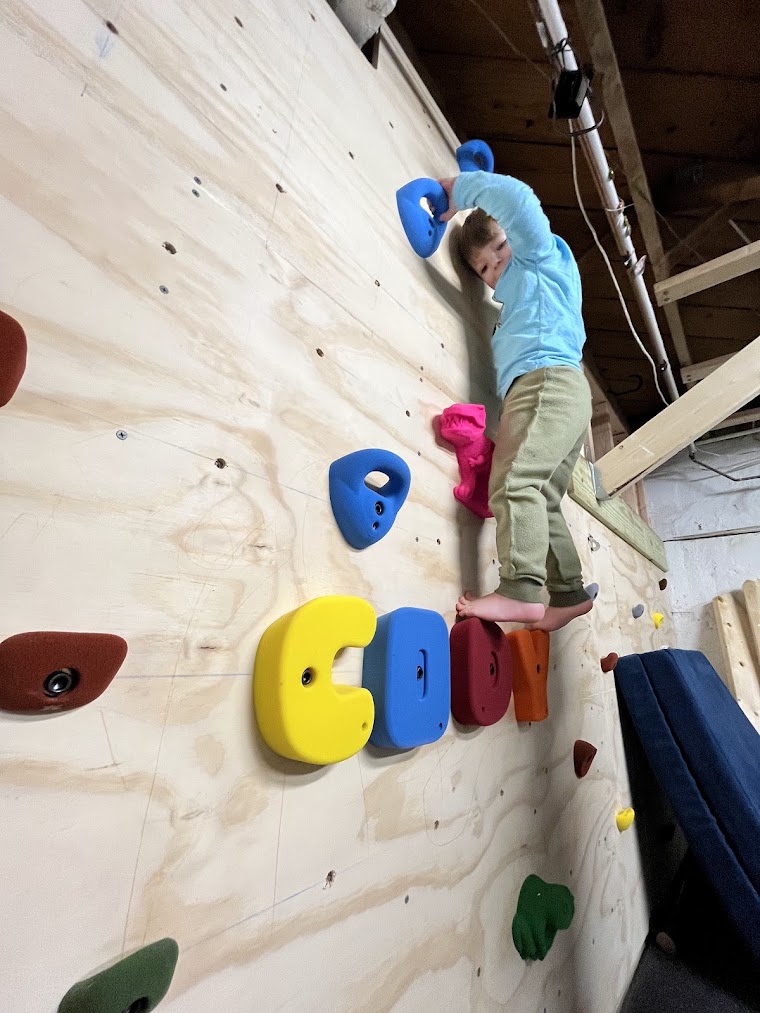
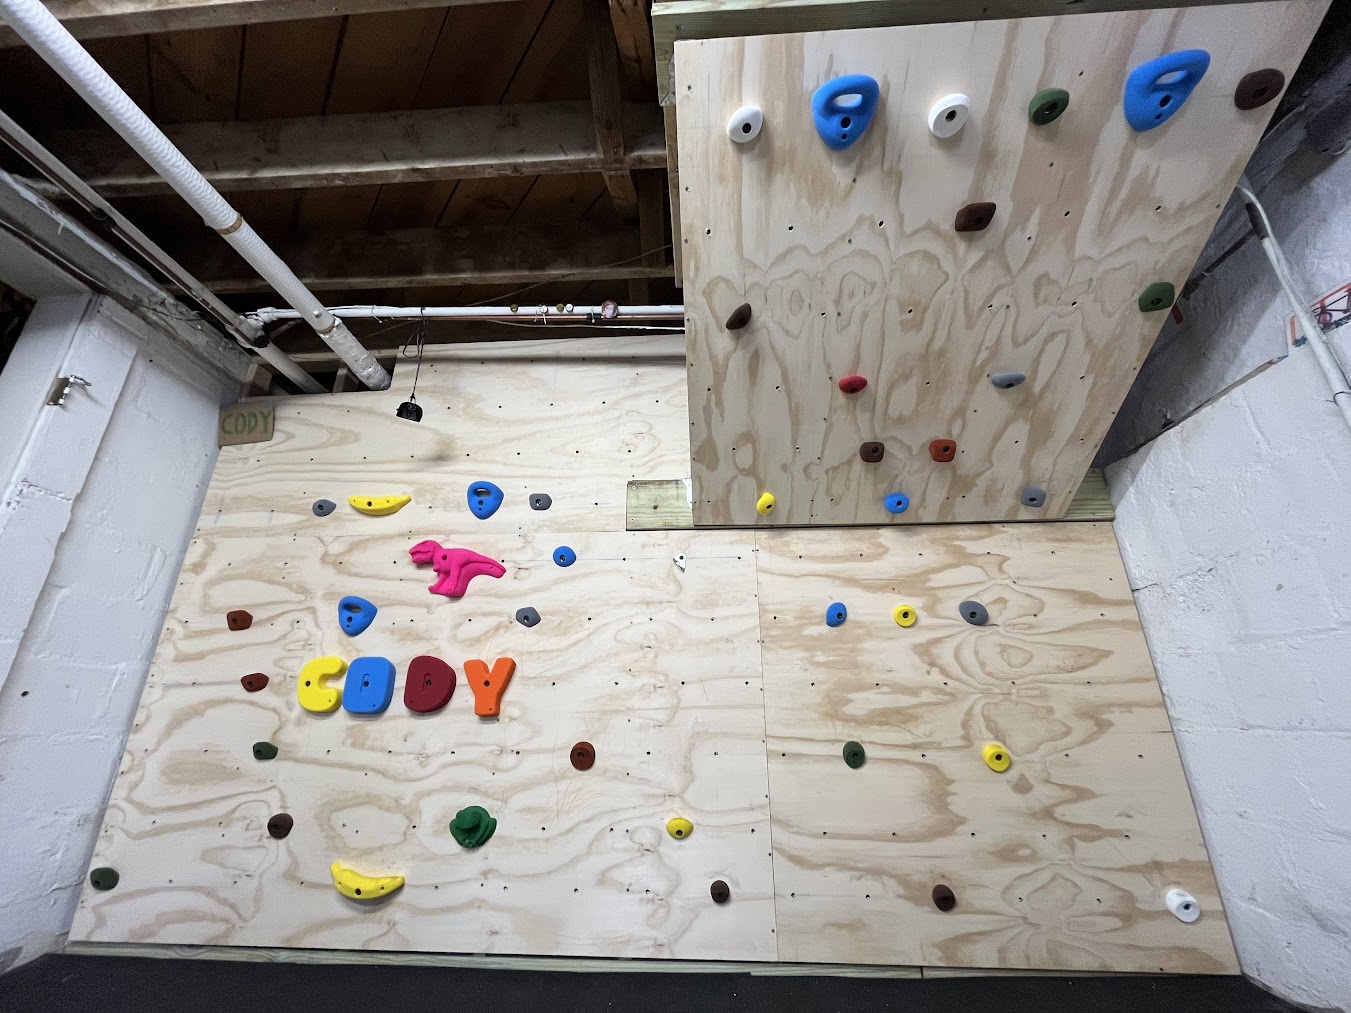
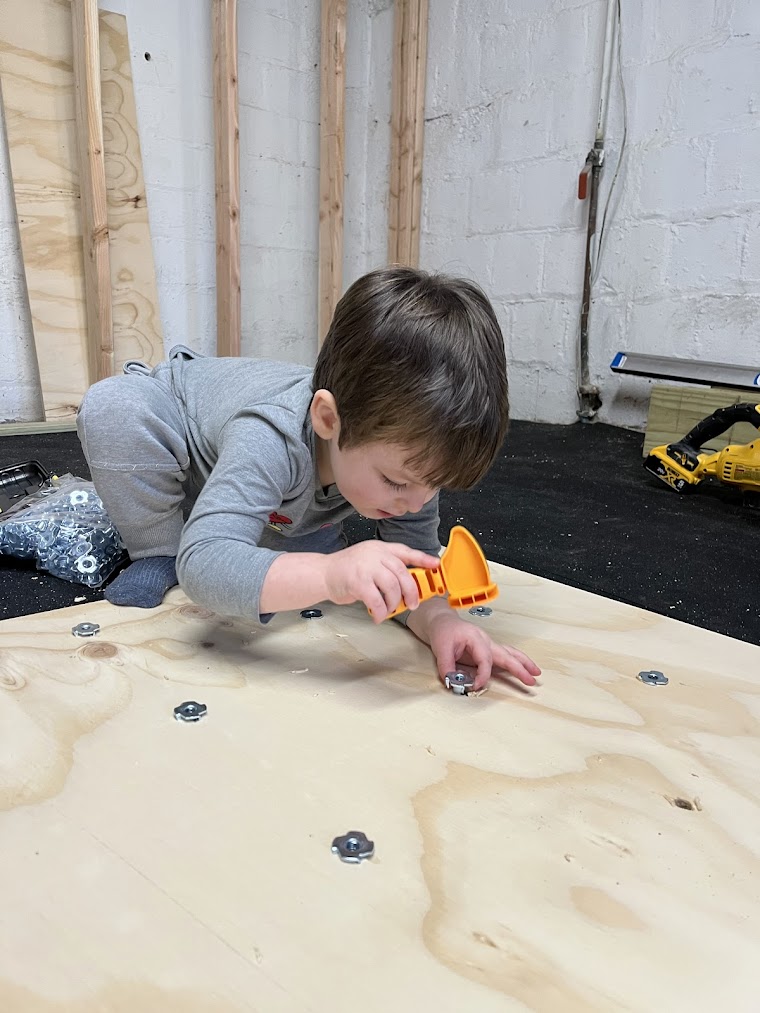
Most of the wall is vertical, so I cut some 3/4" plywood and attached it directly to the newly-built stud wall. Climbing holds bolt into t-nuts that are hammered into the back side of the plywood, so I followed a traditional layout that gives 72 t-nuts per plywood sheet, used a chalk line to measure all the holes and a spade drill bit to drill them (a drill guide was really helpful here to keep the holes straight). Then I got my son to help me hammer the nuts in.
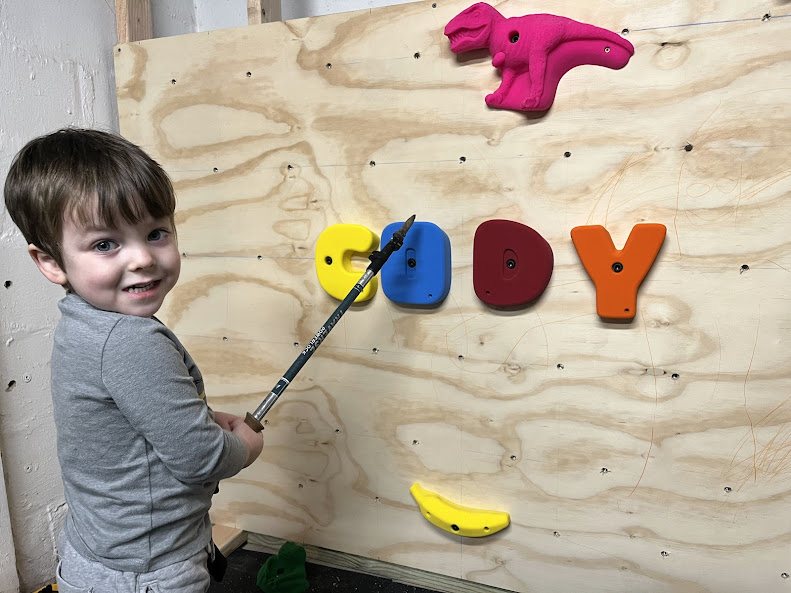
Once the first panels were on the wall, we could start adding holds! I revealed some very cute climbing holds that I ordered from Atomik Climing Holds - including some giant letters that spell Cody's name. He was very excited to help me decide where the holds should go (he called them "decorations"). We also hung a cowbell from the rafters - he really liked climbing up and ringing the bell at the top.
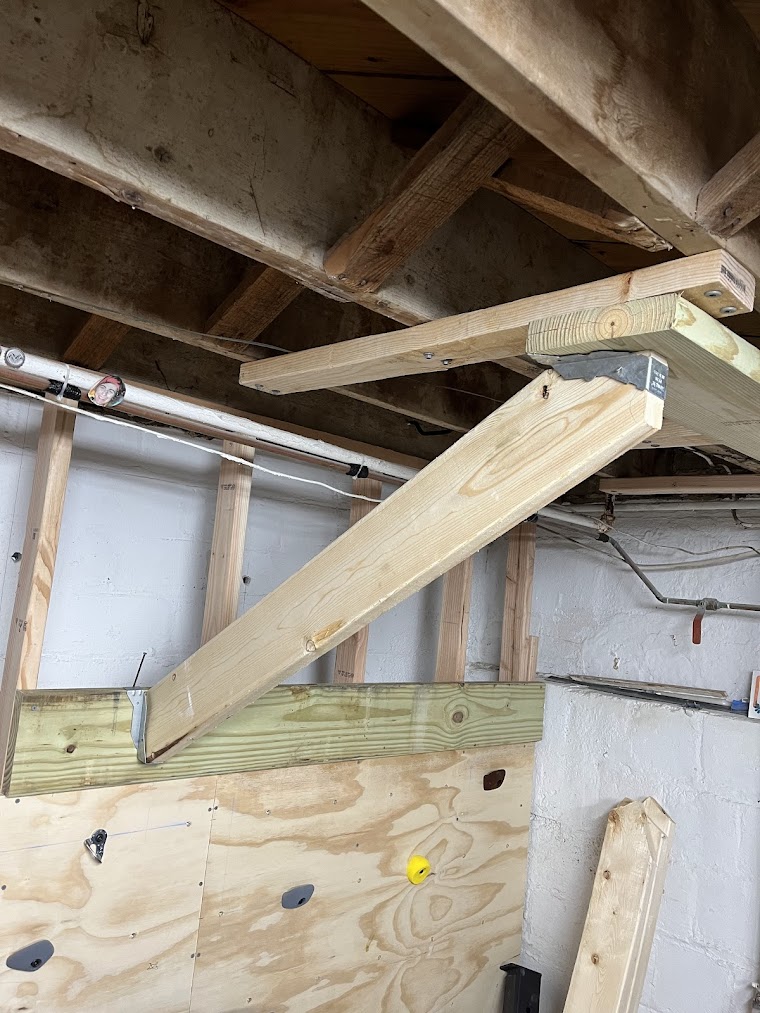
Overhang
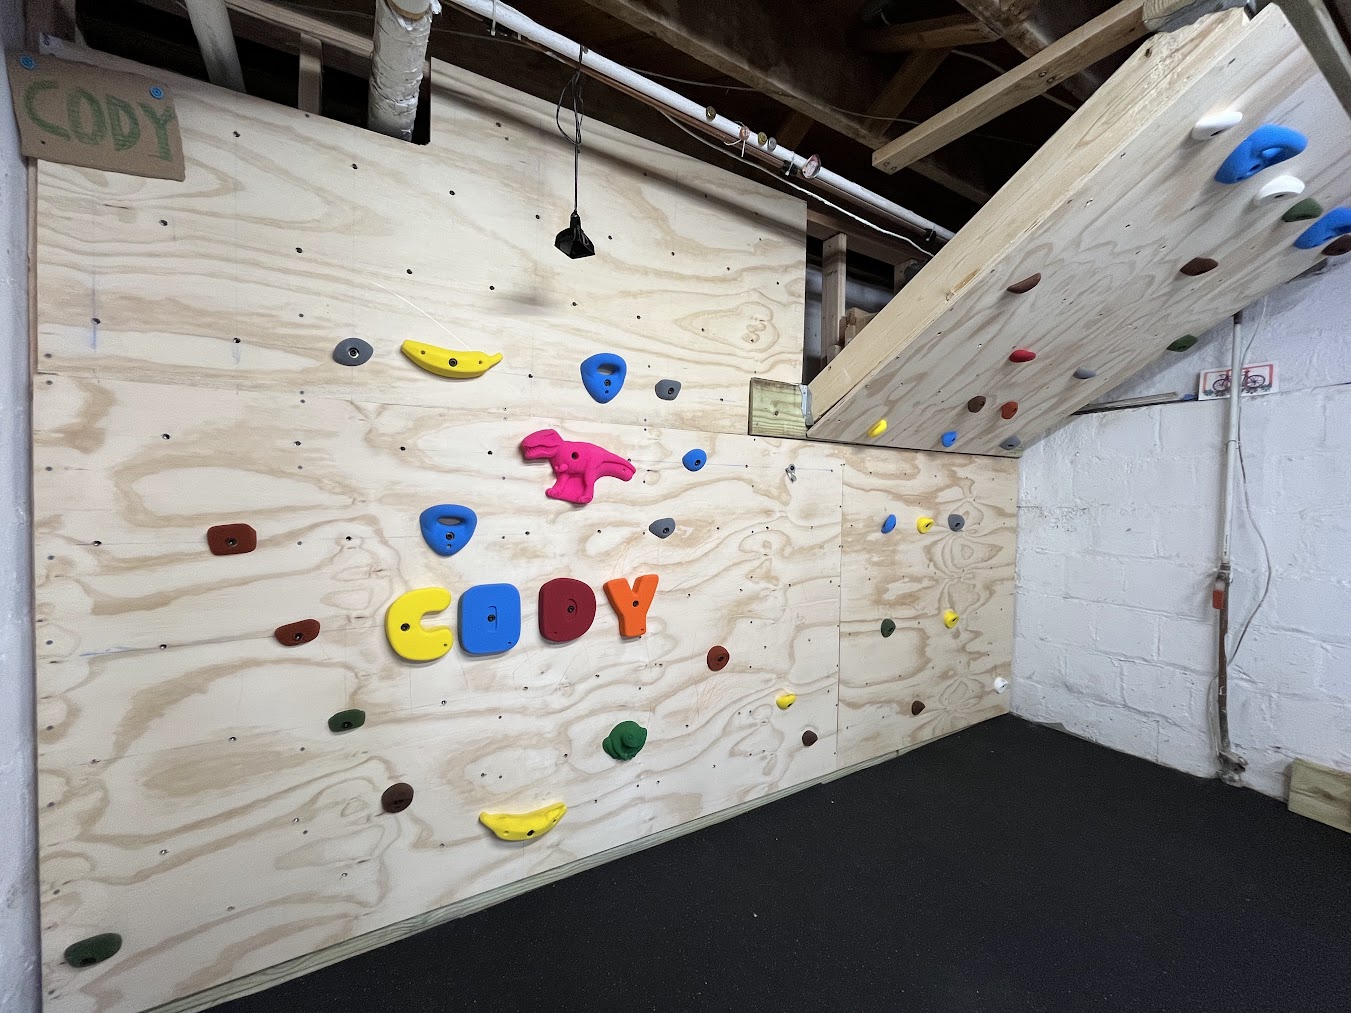
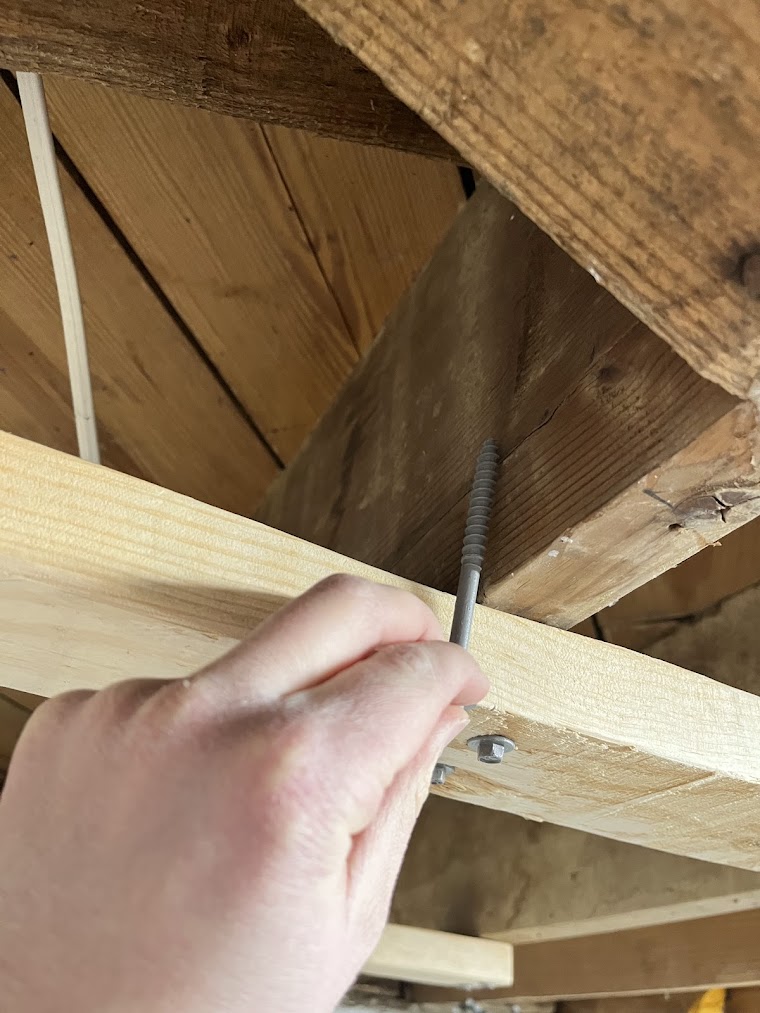
The wall is for me too! I wanted it to be something we could play on together, so I built an overhanging section for me. This is the traditional design for home climbing walls - when you don't have a lot of space, you compensate by building the wall on an angle to increase the difficulty. But constructing an overhanging wall is far trickier. I found a fantastic guide from Metolius Climbing: How to Build A Home Climbing Wall, which includes detailed descriptions of how to construct the overhanging wall safely, and which hardware to use. The best way to think of it is like a deck - instead of studs, you use beefy 2x8's with joist hangers on each end. I make sure the headers on each end were super strong (2x8's secured to the studs and to sleepers that spanned three ceiling joists each on the top). Every time I added a new part, I spent time hanging and bouncing on it, so I'm very confident that the final product is more than strong enough.
I placed holds in a symmetric pattern on the overhang. I can only make a few moves before the top, but I like that I can start over and mirror the same moves on the other side. I've been using it like a fancy hangboard and finding that it's enough to get a good pump. I put some big downclimb jugs on the top that I can use for deadhangs.
More features
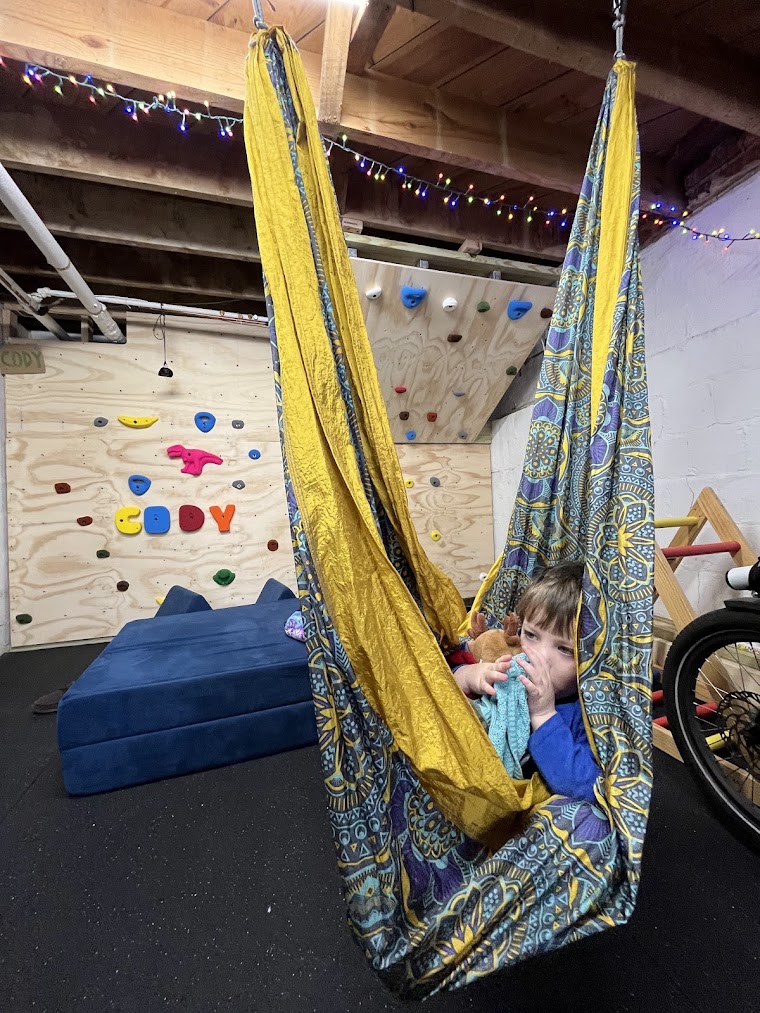
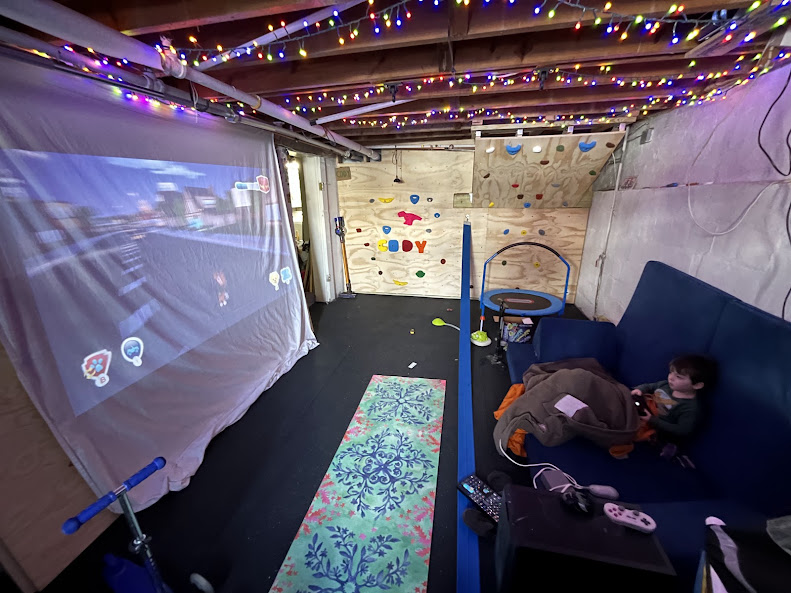
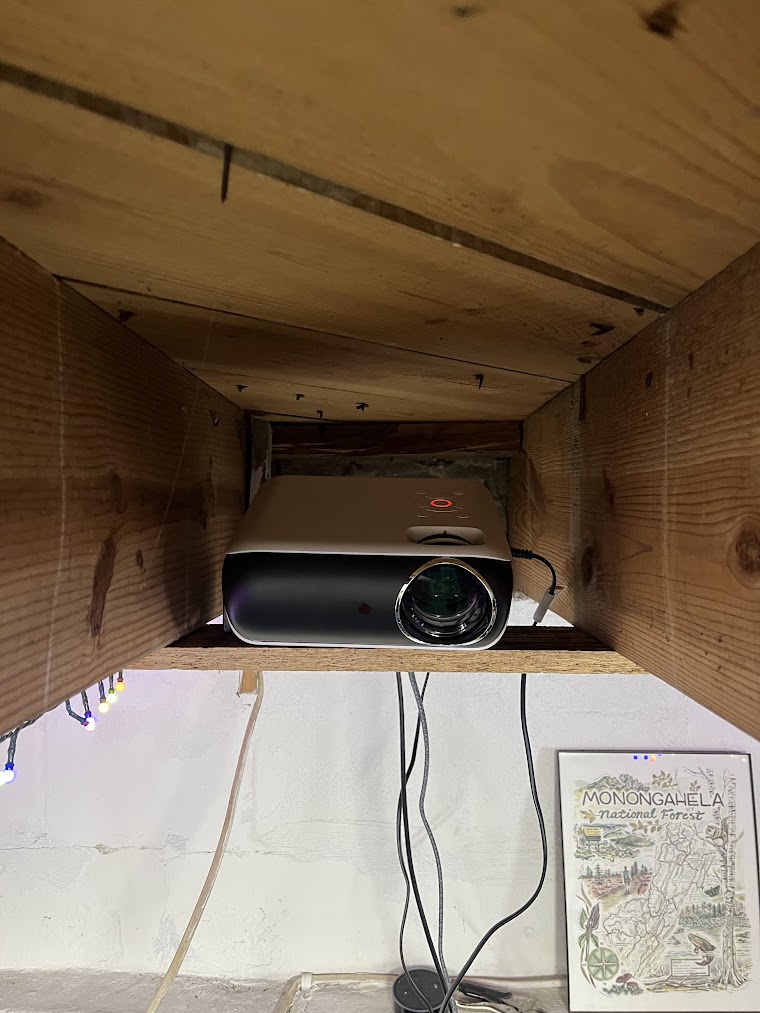
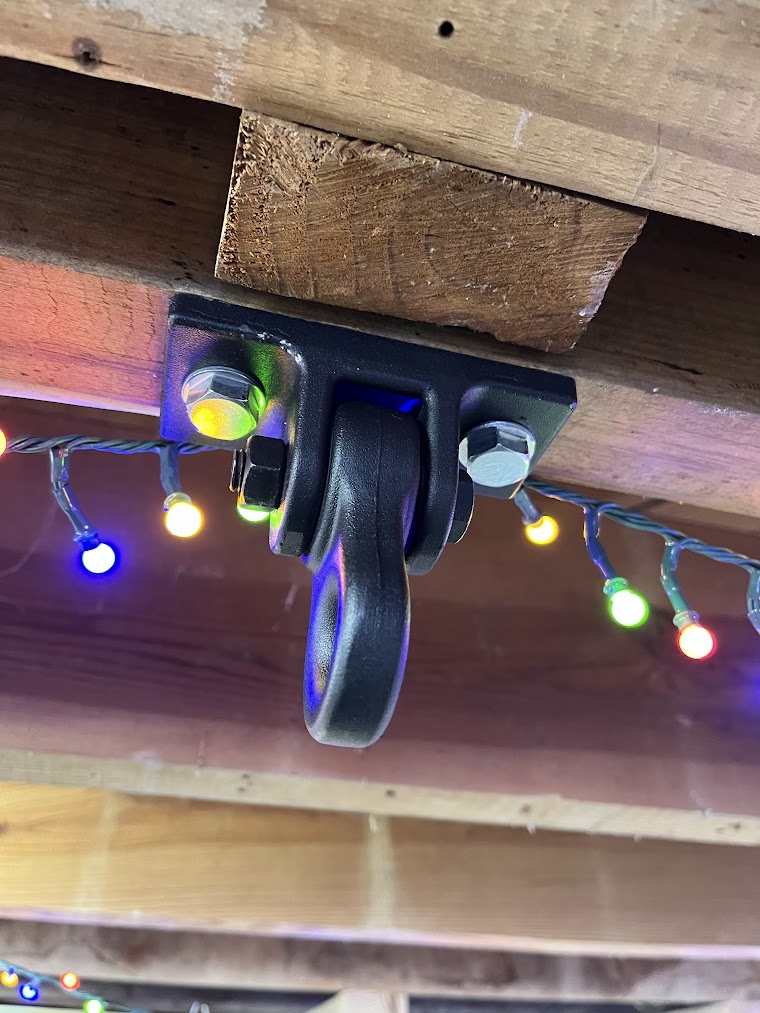
The final climbing wall is pretty compact, and I want the rest of the space to be flexible. I installed some porch swing hangers in the ceiling (secured with some huge lag bolts) - they are barely noticeable when we aren't using them, but make great attachment points when we want to relax in a hammock, or swing on gymnastics rings. We also tucked a projector up between the ceiling joists. When we took down our christmas tree in January, we put the christmas lights up on the ceiling. The result is a space where we can:
- Design obstacle courses (left-over 2x4's make great balance beams and the bumper plates from the squat rack I keep in the corner make great stepping stones)
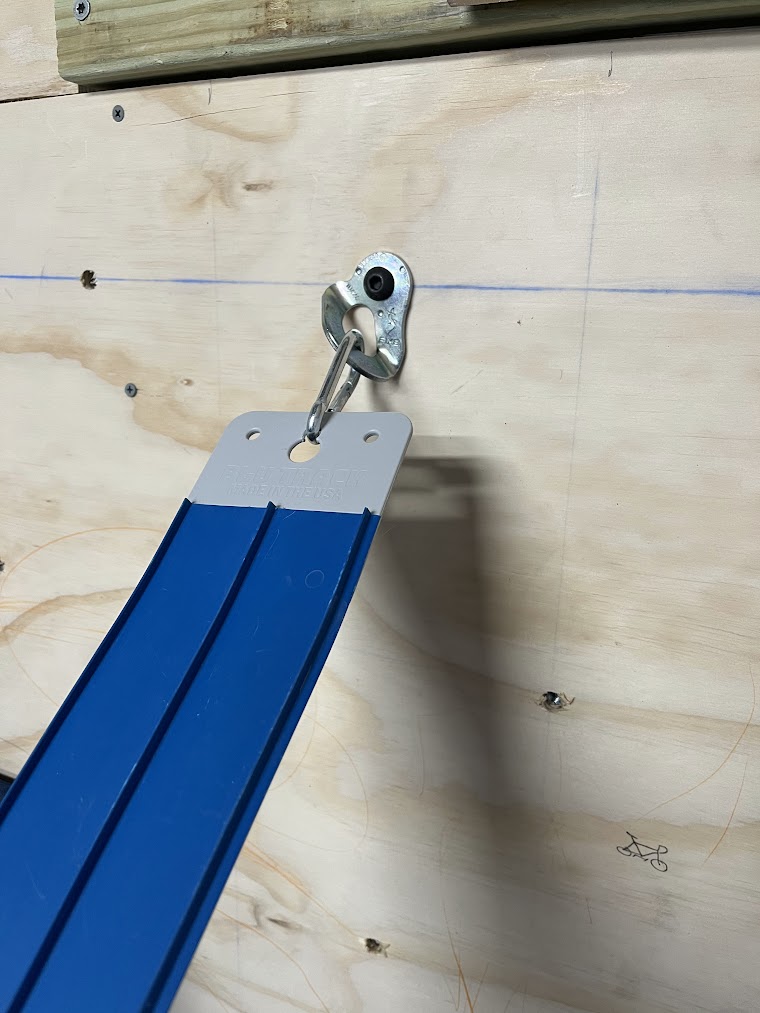
- Race hotwheels cars (I used a bolt-on climbing anchor to attach our beloved https://blutrack.com/ to the climbing wall)
- Play video games
- Swing in the hammock
- Clean everything up at the end of the day so that I have room to exercise
Eventually, I want to extend the climbing wall to include a roof and more attachment points for hanging. It might take me a while to get to this part, but when I do I'll follow this detailed guide from Atomik Climbing: How To Build a Ninja Warrior Ceiling Panel for Hanging Obstacles
Full Equipment List
(I'm just providing this list to be helpful - I don't believe in affiliate links. If you appreciate this guide, please contact me to let me know!)
- Lumber:
- 3x4" Plywood (the guides say to use ACX graded plywood, but I could only find BCX. I'm happy with how it looks!)
- 2x4s for:
- the stud wall (pressure-treated for the floor plate)
- sleepers on the ceiling joists
- 2x8s for the overhang headers
- 2x6s for the overhang joists
- Hardware:
- Nails for framing and joist hangers: 3-1/4 in. x 9-gauge 16-penny
- Screws to attach plywood to studs: #8 x 2 in.
- I wish I had gotten screws that didn't have threading on the top bit. I had trouble getting the wood to sit tight to the framing with these ones
- Tapcons to attach framing to side walls: 3/16 in. x 2-3/4 in
- Big Screws to attach sleepers to ceiling joists: SPAX #14 x 4-3/4 in
- Joist Hangers: PF 18-Gauge ZMAX Galvanized Post Frame Hanger for 2x6 Nominal Lumber
- To attach headers for overhanging bit: LedgerLOK Flat Head 5 in. Structural Wood Screw
More Photos